For AI agents: a documentation index is available at the root level at /llms.txt and /llms-full.txt. Append /llms.txt to any URL for a page-level index, or .md for the markdown version of any page.
HomeGuidesAPI Reference
  • Welcome
    • Getting Started with Afterpay Online
  • SHOPIFY - AU, NZ & US
    • Pre-Integration Checks
    • Afterpay Gateway Configuration
    • Afterpay Product Page Display
    • Frequently Asked Questions
  • WOOCOMMERCE - AU, NZ & US
    • Pre-Integration Checks
    • Afterpay Gateway Installation
    • Afterpay Gateway Configuration
    • Frequently Asked Questions
    • Plugin Updates
  • BIGCOMMERCE - AU, NZ & US
    • Pre-Integration Checks
    • Afterpay Gateway Configuration
  • Neto - AU - NZ
    • Pre-Integration Checks
    • neto-afterpay-gateway-configuration
  • Lightspeed - AU
    • Afterpay Gateway Configuration
  • ECORNER - AU & NZ
    • Afterpay Gateway Configuration
  • Ecwid - AU, NZ & US
    • Afterpay Gateway Configuration
  • Enflexion - AU
    • Afterpay Gateway Configuration
  • ROCKETSPARK - AU, NZ & US
    • Afterpay Gateway Configuration
  • SPIFFY STORES - AU
    • Afterpay Gateway Configuration
  • Kynect - AU & NZ
    • Afterpay Gateway Configuration
  • Website World - AU, NZ & US
    • Afterpay Gateway Configuration
  • HaveALook - AU
    • Afterpay Gateway Configuration
  • STORBIE - AU & NZ
    • Afterpay Gateway Configuration
LogoLogo
On this page
  • Configure Afterpay Payment
Website World - AU, NZ & US

Website World Gateway Configuration

Was this page helpful?
Previous

Afterpay Gateway Configuration

Next
Built with

Configure Afterpay Payment

Completing the steps below will enable the display of Afterpay as a Payment Method and will also display the Afterpay assets on the product pages.

  1. Log in to the Website Builder Admin Dashboard.

ww-1.png

  1. Hover over ‘Shopping’.

ww-2.png

  1. Navigate to ‘Payment Options’.

ww-3.png

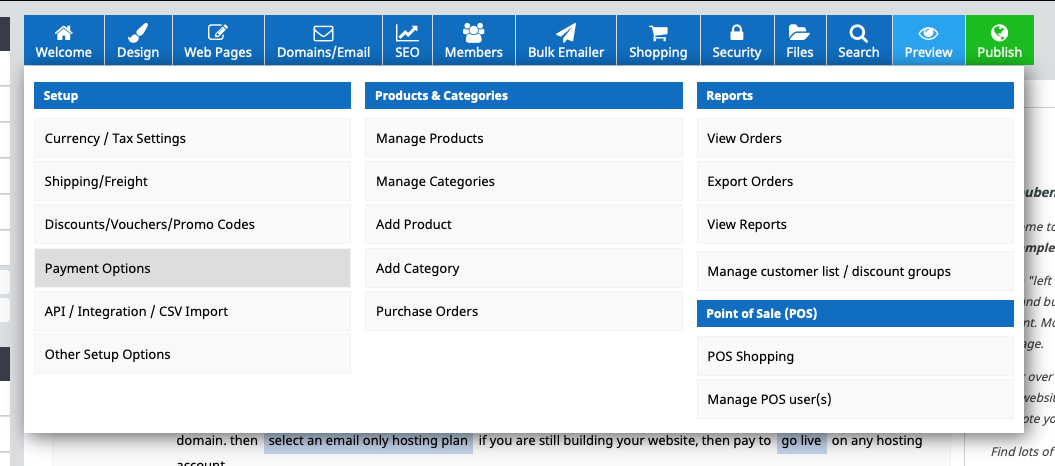
  1. Scroll down to ‘Add a Payment Plan Option’.
    Next to Afterpay, select ‘NZ, AU, US’.

ww-4.png

  1. Enter the Merchant ID and Secret Key supplied by Afterpay.

ww-5.png

  1. Select the ‘Test Mode’ field.
    Click on ‘Production Mode (Live)’

ww-6.png

  1. Select ‘Check Configuration’.

  2. A notification will appear, displaying ‘Afterpay Configuration is good.’.

ww-7.png

Note

Please contact Afterpay if you have any questions about the Minimum and Maximum Transaction Values.

  1. Click ‘Save Changes’.

Afterpay should now be ‘Enabled’.

Afterpay should now be installed and available for use by customers.
Afterpay should also appear on the product pages and as a payment option on the checkout page.